Showing posts with label Soy-free. Show all posts

Sunday, April 12, 2015

How to Make Health and Happiness Part of Your Morning Routine and Red Kidney Bean Sandwich Spread Recipe

Aloha!

This post is mainly about sharing my thoughts on how I make health and happiness part of my morning routine. I was inspired by Aloha to join in on this conversation. There are a few simple things that help me start my day like I woke up on the right side of the bed, even if that is not the case. After checking my email, followed by a shower, I eat breakfast. Eating breakfast is new for me - especially on weekdays, because I wake at 5am most week days and I do not feel hungry at that time. However, I have made breakfast a priority now because it makes me feel more energized and less tempted to binge on food when I come back home from work.

I keep breakfast simple. It is usually two toasts of Ezekiel bread with homemade plant-based sandwich spread, hummus or mashed avocado with sea salt, topped with a slice of tomato, cucumber and a big mound of spinach leaves. Check out my red kidney bean sandwich spread recipe below for easy and cheap toast topper. Instead of bread, you can also use collards or other greens as your sandwich "bread." This recipe found on Aloha's Web Site for collard wrap has inspired me to think outside my bread. I am looking forward to trying it soon.
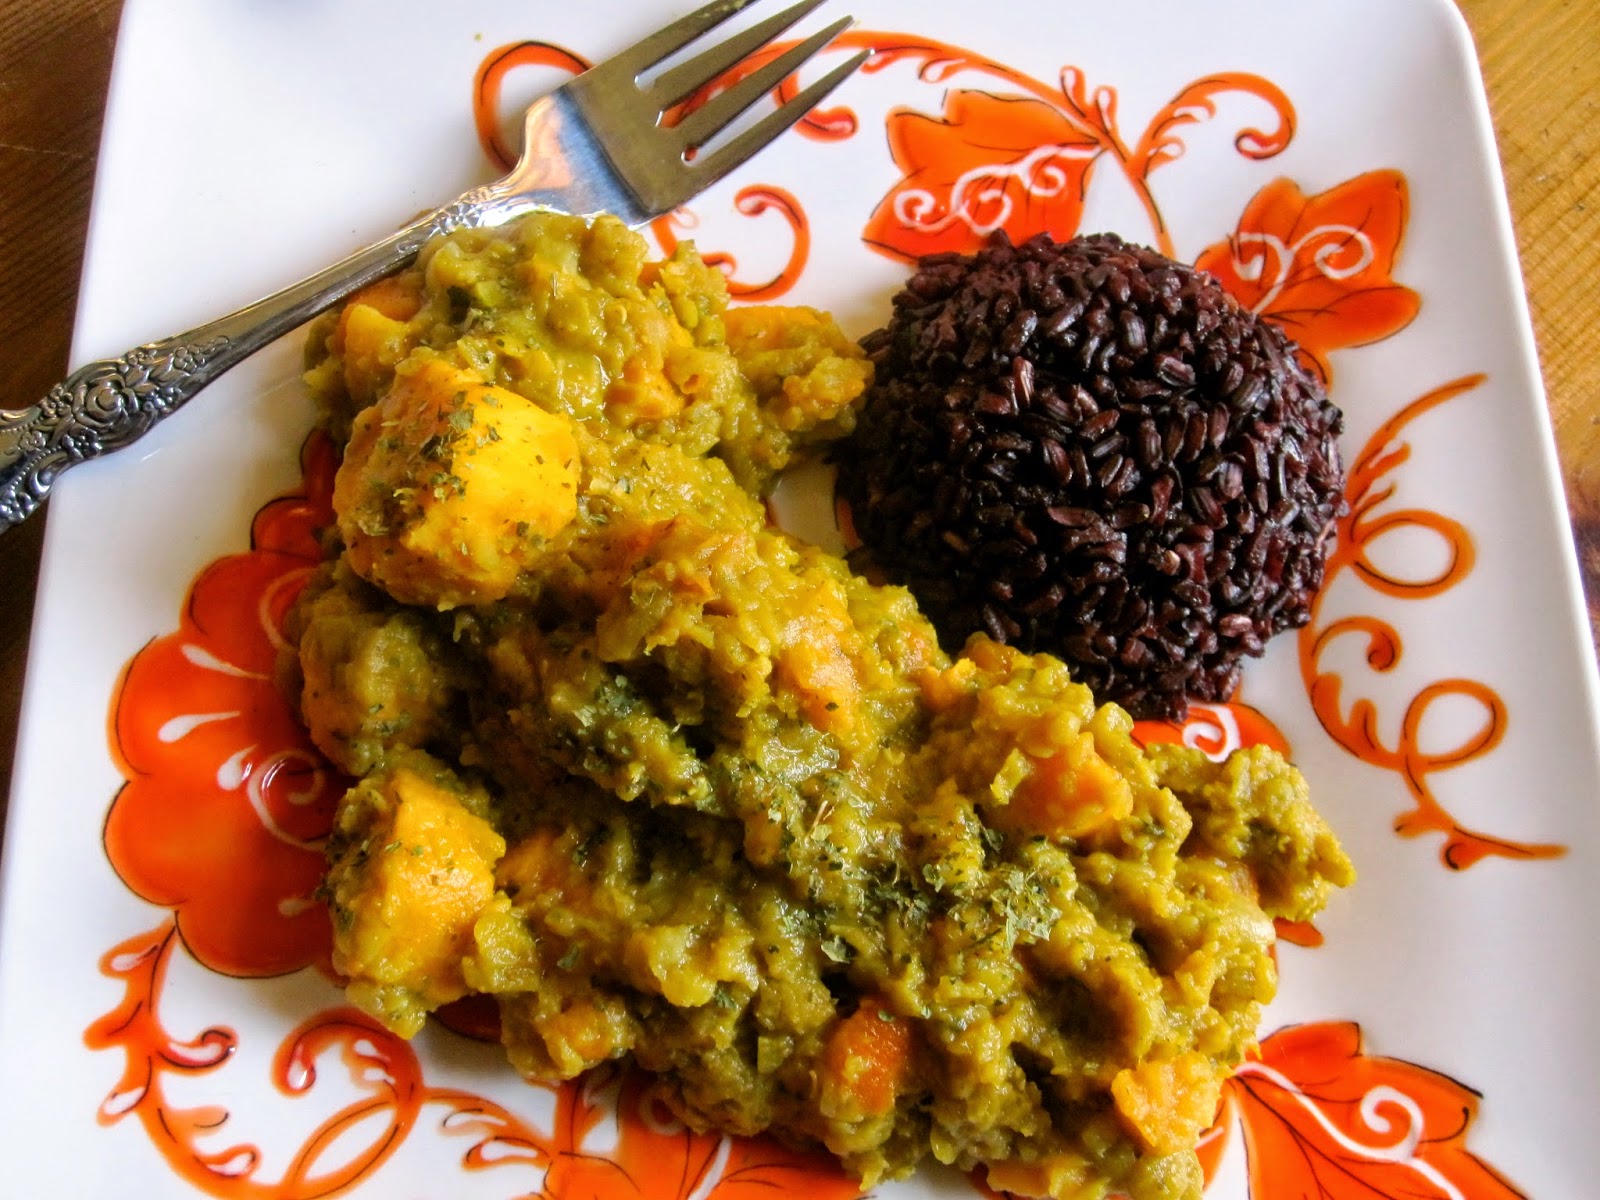
Red kidney bean sandwich spread on two toasts of Ezekiel bread. After I took this picture, I topped both sandwiches with a  mound of spinach leaves. 
My other step to coloring my day with health and happiness via my morning routine is waking my body up. Sounds strange, huh? Well, after you have been sleeping for a number of hours and waking up your brain with a nice breakfast, waking up your body is the next natural step. First, I do Wonder Woman pose to boost my overall confidence for the day ahead.

It is clinically proven that your body language shapes who you are. By practicing Wonder Woman pose each morning or prior to a big presentation at work, try Wonder Woman pose for an extra confidence booster. 
Second, walking to my work instead of taking the train aides in my ability to face the day. By walking, I am getting my daily exercise and I get to relax and reflect during my walk while listening to my favorite music. For me, 80's new wave does the trick. After my 45 minute walking commute, I have released some of my nervous energy. Keep in mind having thoughts about the million things you have to do that day counts as this nervous energy. Spending physical energy by using your body to do it helps get rid of that energy and the less anxious I am, the happier I become.

Now onto the recipe.
Aloha! 
Red Kidney Bean Sandwich Spread

Ingredients
1 (15-ounce can) red kidney beans, washed, drained and mashed
1 small onion, finely diced
2 garlic cloves, minced
2 tablespoons or less of olive oil
Freshly ground black pepper to taste, about 1/4 teaspoon
1 teaspoon or less sea salt
1 teaspoon cumin
1 teaspoon sweet red paprika
1 teaspoon onion powder
1 tablespoon fresh parsley, finely diced

Directions
Preheat frying pan on a medium-low heat. Sauté onion in 1 tablespoon of olive oil for about 5 minutes, stirring often. Add minced garlic and continue sautéing for another two minutes. While the onion and garlic are sautéing, prepare your beans. Drain and rinse the beans, followed by mashing them thoroughly with a fork in a medium bowl. Add the sautéed onion and garlic to the mashed beans along with all the spices. Do not add all the salt at once as you may want add more or less depending on preference. Add chopped parsley and additional tablespoon or less of olive oil to the spread, mix well and taste for additional seasonings. You can eat it right away, and store what is left over in a closed container in the refrigerator for 3-4 days.


Sunday, January 25, 2015

Easy Homemade Crackers

Happy Sunday! I have finally decided to post my homemade crackers recipe I have been putting off for a while. This is mostly due to my laziness - I admit it. Aside from posting this recipe, I have an exciting day planned which includes organizing my closet. You are right, I am not all that excited about this task. It has to be done. I have been consistent with keeping my closet organized for a while, and then it became a mess. I know nothing becomes a mess on its own. Someone told me once disorganized spaces in our homes may reflect what goes on in our minds. Perhaps this is true on some level for me. However, I will not let that deter me from organizing my closet and my mind for that matter, today. Rock on!
Easy Homemade Crackers
Crackers Ingredients
2 cups unbleached all-purpose flour
2 teaspoons baking powder
1 teaspoon salt
1 teaspoon onion powder
1 teaspoon smoked or regular paprika
1/2 teaspoon turmeric
3 tablespoons nutritional yeast flakes
2 tablespoons flavored or regular olive oil (I used garlic flavored olive oil)
3/4 cup or less unsweetened almond or soy milk, add gradually
1/4 cup sesame, poppy or flax seeds to sprinkle on top of crackers, optional
Let's do this! 
Directions 
Preheat oven to 425F. In a large bowl combine flour, baking powder, salt, onion powder, paprika, turmeric, and nutritional yeast flakes. Use a whisk to incorporate all of the dry ingredients. Now add oil and 1/2 cup of milk. You may not need the entire 3/4 cups of milk for this recipe. Begin to knead the dough and slowly add the rest of the milk until all the flour is incorporated. The dough should be moist, but not sticky. This is what the dough should look like.
You can do this! 
Dive the dough into two "equal" parts and roll out each part into a thin pancake. Like this:
Dough divided into two "equal" parts. In case you are wondering, you will not need extra flour for dusting your work surface. The dough comes off easily and does not need extra flour.
We are ready to shape the crackers. You can use any small or even large cookie cutters to make fun shapes like these:
I purchased these cookie cutters on sale at H&M's Home Department for a $1.00. 
Once you cut out the cracker shapes using cookie cutters, combine the remnants of the first part of the dough, roll it out, and continue forming crackers using cookie cutters until all the dough is gone. Now move on to the second half of the original dough you set aside. Repeat the process.

Note: The more you work with the same dough the less pliable it will become. To prevent this, be sure not to combine the remnants of the first half of the original dough with the other half of dough you set aside.
Fun activity for both adults and the little ones. 
If you are not up to speed with using cookie cutters to shape your crackers or you simply do not have any cookie cutters on hand, no worries. Use a knife to cut your crackers into squares on an angle or however you prefer. Like this:
You can do this directly on an oiled cookie sheet pan or a working surface, followed by placing the cut out cracker shapes on an oiled cookie sheet pan. 
Before the crackers go into the oven, be sure to oil the cookie sheet pan with a non-stick cooking spray. I do not own a cookie sheet pan at this juncture of my life. I used aluminum foil coated with non-stick cooking spray instead to bake the crackers. Beware of slippage when taking out baked crackers from the oven when using aluminum foil instead of a cookie sheet pan. I have lost a few cracker friends this way. I recommend using a cookie sheet pan to bake these crackers instead of aluminum foil if available.
Now sprinkle sesame seeds on the crackers and gently press them into the dough. Do not use non-stick cooking spray at this point. If you do, the sesame seeds will fly away. Literally. 
Bake the crackers for 9-10 until the crackers are golden brown, but not burnt.
Ready to party!
These crackers are best eaten when fresh. These also taste great the next day, but are not as crunchy. Serve with salsa, hummus or drop a few to your soup for good measure. Store in a closed container lined with a paper towel to absorb moisture for up to 3 days.
Cheers! 

Sunday, December 14, 2014

Easy Vegan Fudge Recipe and Coming to Terms With Inevitabily Saying Goodbye to a Feline Friend

Meet Othello - 15 year old, intelligent single Black and White male, a ruler over his four adopted feline siblings, all rescued from the mean streets of Wherever. Othello is a former New Yorker, born in Brooklyn yo! Now Othello is a Bostonian, although his beer choices are questionable (see picture above) for a Bostonian. Sam Adams anyone? Othello's main talents include throwing down often valuable and very breakable objects and shredding important paperwork, in the middle of the night and when seeking attention. Additionally, Othello is capable of opening closed doors using his paws. More importantly, Othello is LOVED immensely and I hope he knows it.

I did not plan on returning to blogging evoking feelings of sadness. Yet, I was compelled to to do so in effort to share Othello's life, seek comfort in distraction and to encourage others to rescue a friend from the streets of Wherever to save a life. Reasons for adopting a furry companion may differ to us, but as long as we are able to provide physical, emotional and medical care, our reasons are not that relevant to the furry friend in need. Othello was found few weeks after being born in a dirty basement of a grocery store in Bedford-Stuyvesant, also known as Bed-sty, Brooklyn. He was the weakest of the litter evidenced by his size and being beaten up by his litter mates. This is of course the reason why I fell in love with this little guy. Take a look below at baby Othello. 

Othello and Blue, my other feline friend who is currently 16 years old and still very feisty, hanging out. 
Othello has struggled with health issues since young adulthood including chronic asthma and urinary crystals. His conditions were/are managed with diet and surprisingly infrequent veterinary care and without ongoing medications.

Othello grew into this handsome adult depicted below. He always exudes confidence and does not take any crap. I said it! I love Othello's personality. He is above the immature feline shenanigans Othello's adopted feline siblings continue to engage in, yet he seeks the company of both humans and felines alike whenever possible. 
Othello's humble beginnings may have had something to do with his past and current health issues. However, Othello is lucky for being chosen for his perfect imperfections (smallest of the litter). I encourage all to do the same when rescuing a furry friend. Imperfections are awesome and sometimes very expensive. In spite of that, Othello is worth it. Who cares about obtaining more possessions, right? 

Othello is currently home after his three day hospitalization. He does not want me to discuss his current medical issues because there is fudge to make and he is a bit embarrassed about it all. Othello is looking forward to spending time ruling over his kingdom and continuing to be loved for as a long as he will let me. 

Othello Update: December 15, 2014
My beautiful kitty passed away today....I am heartbroken. He fought and was loved until the end. I miss my sweet smart little boy.   

Now onto the recipe. As a form of distraction and to commemorate this holiday season, which blows thus far - SORRY! - I tried my hand at making vegan fudge using pantry ingredients. I dedicate this recipe to Othello and call it Othello's Fudge. It is delicious and even smells good. 
Take a look at Othello's Fudge and make it immediately. This type of fudge is one I do not mind cleaning up after if you know what I mean. 

Othello's Fudge Ingredients
1 cup unsalted smooth peanut butter or any nut butter, refrigerated or at room temperature 
3/4 cup coconut oil, at room temperature 
1/3 cup agave nectar (I used light agave nectar)
1 and 1/2 tablespoon pure vanilla extract
1/4 cup rolled oats, blended 
1/4 cup unsweetened cocoa powder
1/4 teaspoon Himalayan pink sea salt (optional)
Directions
Place the oats in a blender or a food processor. Blend until the oats have powder like consistency, but be sure to leave some texture. This should take a second or two. Now, in a medium bowl, combine all of the ingredients except sea salt. Use a wooden spoon to incorporate all the ingredients well, until the coconut oil has become smooth. Be sure not to leave any white coconut oil lumps. The process of incorporating all the ingredients, specifically the coconut oil, took me about 10 minutes. To avoid this 10 minute arm workout, you can use melted coconut oil instead of solid state coconut oil, but it will take longer for the batter to solidify. 

Now, place the fudge batter in a small loaf pan lined with plastic wrap leaving enough wrap on the sides. Be sure to coat the plastic wrap lined loaf pan with non-stick cooking spray before placing the fudge batter inside. Smooth out the fudge batter evenly with a spoon in the loaf pan, sprinkle the sea salt on top if using, and place it in the refrigerator, uncovered, for about two hours. 


The removal of the fudge from the pan is quite easy. Pull on the sides of the plastic wrap and gently remove the fudge. Now remove the plastic wrap and place the fudge on the cutting board and slice it to as many or as few pieces as you desire. Be sure not to touch the fudge with your hands too much as the temperature of your hands will bring down the temperature of the fudge evoking a melt down effect. We do not want that. 

Store the fudge in a refrigerator in a closed container for up to one week. 

Be sure not to give Othello's Fudge to your furry companions. It is all for you! Be selfish for once. 

Cheers! 

Saturday, July 5, 2014

Mushroom Chickpea Buckwheat (Kasha) and Easy Saucy Carrots

Buckwheat or kasha is a popular grain used in Polish cooking. It was first cultivated in the Balkan region of Europe circa 4000 B.C. The most traditional way of making kasha is to serve it with mushroom gravy. I chose not to make a mushroom gravy this time because the Saucy Carrots - ha! ha! - I am making along with kasha are enough. There is no need for additional sauciness.

Carrots are a lovely vegetable that are a staple in Polish cooking. They are cheap and nutritious. Moreover and in my humble opinion, carrots should be a base to any meal, in addition to onion and garlic of course.

My mom is a carrot enthusiast and she adds tons of carrots in any meal she makes. This is her secret way to make my brother eat vegetables. It works and he has no clue in spite of his intelligence. Sorry brother. I had to go there.

Mom told me about her favorite way to make carrots which  is to cook them in a flavorful broth. I used a mushroom bouillon cube to flavor the carrots, but you can use any vegan bouillon cube or broth you fancy.

Cheers!
Mushroom Chickpea Buckwheat (Kasha) and Easy Saucy Carrots 
Mushroom Chickpea Buckwheat (Kasha)

Ingredients
1-2 tablespoons olive or canola oil
1 medium onion, finely diced
3 medium sized portabella mushrooms, roughly chopped (with gills)
1 (15-oz can) chickpeas, drained and rinsed (any 15-oz can of cooked beans may be substituted)
1 and 1/2 cups roasted buckwheat (also known as kasha)
Freshly ground black pepper (about 1/4 teaspoon)
1 teaspoon salt
1 tablespoon marjoram
1/2 tablespoon dried thyme
1 tablespoon dried dill
3 cups mushroom broth or 3 cups water and 1 mushroom bouillon cube

Directions 
Sauté the onion and mushrooms in a large pan, in oil, over a medium heat, for about 10 minutes. Add all the spices while sautéing these vegetables.

Now add the buckwheat and mushroom broth or 3 cups of water and 1 mushroom bouillon cube. Stir, cover and bring to a boil.

Once boiling, lower the heat to medium-low and continue cooking until all the broth is absorbed and the buckwheat is fluffy. This should take about 15-16 minutes. Be careful not to overcook the buckwheat. Turn off the heat, stir in the chickpeas, and taste for additional seasonings.  Serve with a side of Saucy Carrots.
Easy Saucy Carrots
Easy Saucy Carrots 

Ingredients
6 large carrots, diced
1/2 teaspoon salt
Mushroom broth or water and 1 mushroom bouillon cube (enough to cover the carrots)
1-2 teaspoons corn starch

Directions
Before we begin, a few words about boiling carrots. There are few tricks that help to keep the carrots' nutrients while boiling.

First, leaving the skin on helps the carrots retain nutrients. I buy organic carrots, and I am comfortable leaving the skin on. If you can't do that, be sure to peel your carrots carefully so that only a thin layer of skin is peeled. No double peeling per side.

Second, when chopping the carrots, be sure to cut them in a bigger size rather than smaller pieces. This helps with keeping the nutrients as well.

Lastly, cover the carrots with barely enough liquid. Use this liquid at the end of cooking time as the sauce base. That way, nothing gets wasted and the nutrients are preserved.

Let's make Saucy Carrots! Ha ha! Start making this dish at the same time you are preparing the Mushroom Chickpea Buckwheat (Kasha) and also during the time you are sautéing the onion and mushrooms.

In a medium pot, add the chopped carrots, and cover the carrots with mushroom broth (or water and 1 mushroom bouillon cube). Do not add too much liquid, you need enough to cover the carrots, but do not submerge them completely. Cover and bring to a boil.

Once boiling, lower the heat to medium-low and cook until the carrots are soft, but not mushy. The cooking time will depend on the amount of the carrots. This can range between 20 to 30 minutes.

Turn off the heat, season with salt and stir. Remove about 1/2 cup of cooking liquid from the carrots into a bowl and whisk in 1 teaspoon of corn starch. Add this cooking liquid with corn starch back into the carrots and stir. It will thicken and make a nice sauce. Add another teaspoon of cornstarch, following the same directions, if the sauce is too thin. The sauce takes about a minute or so to thicken.

That's it! Let's eat.
Perfect match! I added additional dried dill on both for garnish. 
Store both dishes in the refrigerator, in separate and tightly closed containers, for up to a week.

Saturday, June 28, 2014

Easy Gluten-Free Banana Bread

I was not planning on making a banana bread anytime soon and yet I was compelled to do so when I looked at my counter filled with overly ripe bananas. I have been on a banana eating frenzy for quite some time. I am unable to explain it. I always liked bananas, but never to this extent.

I like bananas to be a particular way before I eat them. They have to be somewhat green, and not soft. I will not eat ripe bananas. This is why I made this banana bread. I also had some leftover gluten-free flour mix I wanted to finish up, hence a gluten-free creation. Use regular flour if if you prefer, just be sure to add it gradually. You may need less of regular flour than the two cups of gluten-free flour indicated to make this recipe.

Cheers!
Banana Bread
Banana Bread

Ingredients
4 medium overly ripe bananas, mashed
1/2 teaspoon cinnamon
1 tablespoon chia seeds
1/4 cup unsulphured molasses, maple or agave syrup
2 teaspoons baking powder
1/4 cup melted coconut oil or canola oil
2 cups gluten-free flour (I used Bob's Red Mill Gluten-Free Biscuit and Baking Mix)

*Non-stick cooking spray for coating the baking dish.

Directions 
Preheat oven to 350F.

In a large bowl mash the bananas with a fork. Leave some chunks of banana for texture. Add cinnamon, chia seeds, and baking powder. Mix well to incorporate the baking powder. Add the gluten-free flour, molasses, and coconut oil. Mix well using a spatula.

Coat a 9 x 5" loaf pan with non-stick cooking spray and add the banana bread batter. Wet your fingers with warm water to spread the batter in the loaf pan "evenly." The batter will be sticky and difficult to spread using a spatula. I find this method most effective for this task.

Bake uncovered for 30 to 35 minutes until a clean toothpick or a metal skewer comes out clean when inserted in the center of the banana bread.

Allow 10 minutes to cool off before removing from the baking dish and slicing.

Store in a tightly closed container, in room temperature, for up to 3 days. Be sure to place a paper towel on the bottom and top of the container to absorb excess moisture.
Eat!

Saturday, June 21, 2014

Quinoa and Green Lentil Summer Salad with Sunflower Seed Parsley Dressing

Apparently today is the first day of summer - woo hoo! I concluded my soup-making plan, during spring, to keep summer away, would eventually stop working for me. Well, if you can't beat them, join them.

In spite of what the population at large may think of vegans, we do not eat salads everyday. In fact, I hardly ever eat salads. I find myself eating salads when I go out to eat. The reason for that is due to bleak selections offered.

Even so, I made a salad now given it is summer. Eating cold foods helps me to remember my long lost friend: Winter.

This salad has a good source of plant protein and complex carbohydrates coupled with good fats (sunflower seeds) to keep you satiated longer.

Cheers!
Quinoa and Green Lentil Summer Salad with Sunflower Seed Parsley Dressing
Quinoa and Green Lentil Summer Salad

Salad Ingredients
1 cup quinoa, cooked in vegetable broth and according to package directions, cooled (I used organic tricolor quinoa)
1 cup green or brown lentils, cooked in vegetable broth and according to package directions, cooled (I used small green lentils)
4 small or medium carrots, peeled and shredded (I used organic rainbow carrots)
1 pint cherry tomatoes, sliced in half
1 medium cucumber, peeled and diced (roughly the same size as the tomatoes)
2 green onions, finely chopped
Freshly ground black pepper (about 1/4 teaspoon)
Salt to taste (1/2 to 1 teaspoon)

Dressing Ingredients
1/3 cup raw sunflower seeds
Juice and zest of 1 medium lemon (I used organic lemon due to utilizing its zest and because lemons were on sale)
Freshly ground black pepper to taste (I used 1/4 teaspoon)
1/2 cup fresh parsley, firmly packed
2 tablespoons less sodium soy sauce (use Tamari for gluten-free option)
2 tablespoons sweet chili sauce
1/4 cup water or vegetable broth
Great the next day in a wrap or pita. 
Directions 
First cook quinoa and green lentils in separate pots. You can do this the night prior. That way, when you are ready to make this salad, your main ingredients - Miss Quinoa and Mr. Green Lentil - will be ready.

I cook one cup of quinoa and 1 cup of green lentils, separately, using the same ratio of vegetable broth (2 cups) to seed (quinoa is a seed not a grain) and legume (green lentils are legumes).

Thus, if you are a rebel and choose to follow my directions instead of the package's, add 1 cup of quinoa and 2 cups of vegetable broth to a pot, and bring it to a boil. Once boiling, lower the heat to medium-low, cover, and cook for about 15 minutes. Follow the same steps with green lentils. However, note the cooking time for green lentils will be longer (about 25 to 30 minutes). Allow both quinoa and green lentils cool completely before beginning this recipe. Be sure to fluff the quinoa with a fork once cooled for a fancy pants effect.

Prep the vegetables and make the dressing while the quinoa and lentils are cooking.

*Tip: To ensure vegetable broth or water evaporates quicker when cooking grains, seeds or legumes, uncover the pot half way between the designated cooking time. For example, uncover the quinoa about 7- 8 minutes into its total cooking time. This technique helps with preventing from the mushy effect to occur.  

Salad time, finally!

Place the cooked and cooled quinoa and green lentils in a large bowl. Add all the vegetables and mix gently. Season with salt and pepper. Taste as you go!

To make the dressing, place all the dressing ingredients in a food processor or a high-speed blender and blend until smooth. Pour the dressing over the salad and taste for additional seasonings.

Store in the refrigerator for up to 3 days, in a tightly covered container.

Peace out!
Eat! 

Friday, June 20, 2014

Polish Stewed Beans and the Story of Handsome Johnny

Long time ago, in a land far far away called Polandia, lived a little girl who liked to eat beans. The girl's mom made her stewed beans often, using large white beans called "Piekny Jas" - translation from Polish: handsome Johnny.

Although this little girl did not know the name of these beans back then, she continued her adoration for this legume. Her love affair ended when she came to live in another land called USlandia.

The little girl, now an adult, has never forgotten about these white beans, and one day, while shopping at a Polish grocery store, she found them. She picked up a package of large white beans called "Piekny Jas" and she said to herself: "What the cat is Piekny Jas?" And then she knew....

Once again, the beans and the girl were reunited.

The end and cheers! 

Polish Stewed Beans
Polish Stewed Beans
*Requires approximately 1.5 hours cooking time. 

Ingredients
1 pound large white beans of choice, soaked in water and in the refrigerator overnight (I used Handsome Johnny large white beans)
1 tablespoon olive oil
1 medium onion, finely diced
1 (10-oz package) white mushrooms, sliced
3 garlic cloves, minced
1/2 tablespoon dried thyme
1 tablespoon dried oregano
1 tablespoon dried marjoram
1 teaspoon onion powder
Freshly ground black pepper (about 1/4 teaspoon)
1/2 to 1 teaspoon salt - optional (add last and use less or more depending on preference)
1 (12-oz can) tomato paste
3 to 4 cups strong vegetable broth

I like to store these suckers in a jar and in my refrigerator. 
Directions 
The night prior to cooking this dish, place one pound of beans in a container and add enough room temperature water to cover all the beans. Place in the refrigerator overnight.

Let's cook!

In a large soup pot, sauté the onion, mushrooms and garlic in oil, over a medium heat, for about 10 minutes. Add onion and mushrooms first and garlic last. Otherwise there is a strong possibility the garlic will burn. Burnt garlic is not our friend.

Now add all the spices except for the salt and also add tomato paste. Continue cooking for another two minutes. My reasoning behind adding salt last is that tomato paste in itself is salty. Upon cooking the tomato paste further for an extensive amount of time such as is required for this recipe, it may taste even saltier. Lastly, add the drained beans and 3 cups of vegetable broth.

Cover and bring to a boil. Once boiling, lower the heat to medium-low, and cook for approximately 1.5 hours until the beans are soft but not mushy. The cooking time depends on the type of beans you use. Using smaller white beans may shorten the cooking time. Be sure to stir once in a while and add more vegetable broth if necessary.

Taste for salt and add if you so fancy. Store in a refrigerator for up to one week.

Peace out!
Cool beans!

Saturday, June 14, 2014

Easy Pantry Millet Cutlets

In preparation for my impending move, I am attempting to use up my pantry items, so that less packing is involved. Unfortunately, I keep on sneaking pantry items back in when grocery shopping. I can't help myself when I pass by a pretty package of red lentils. I have to get them!

Anyhoodle (not an actual word, but it should be), recently I stumbled upon an open package of millet living in my pantry. Naturally, I was inspired to make millet cutlets. These are very easy and quite tasty. Even a non-vegan liked them and noted: "ho! ho! ho! these are pretty good!" Everything is true except the "ho! ho! ho!" part.

Don't take anyone's word for it though, decide for yourself.

Cheers!
Millet Cutlets served on toast with hummus, topped with sunflower sprouts. 
Millet Cutlets (Makes 6 Medium Sized Cutlets)

Ingredients
1 cup millet (Cook it in vegetable broth and according to package directions. Once cooked the initial amount of millet will double.)
1 cup cooked red kidney beans, mashed with a fork (Substitute with beans of choice if red kidney beans are not your THANG.)
2 teaspoons onion powder
1/2 teaspoon granulated garlic
2 teaspoons dried parsley flakes
1 teaspoon chili powder
Freshly ground black pepper (About 1/4 teaspoon.)
2 teaspoons less-sodium soy sauce (Use Tamari for a gluten-free option.)
1/4 cup nutritional yeast (Optional, but highly recommended.)
1/3 cup organic ketchup (Add gradually. If not using nutritional yeast, you may not need as much ketchup to bind these cutlets.)
Salt to taste (I did not add any, however your taste buds may prompt you to do so.)

*Vegetable oil for frying.

Directions
First cook the millet in vegetable broth and according to package directions. This should take about 10 minutes. If not using vegetable broth, be sure to season the cooking water with salt (about 1/2 teaspoon). I added 2 cups of vegetable broth to 1 cup of millet, covered it, and brought it to a boil. Once boiling, I lowered the heat to medium-low and cooked it until all the broth has evaporated, for about 8-10 minutes. Once cooked, I fluffed it with a fork and set aside in a bowl to cool off.

Let's make cutlets!

To the bowl with the cooling cooked millet, add the mashed beans, and all remaining ingredients except salt and ketchup. Mix the cutlet batter with your hands and add the ketchup, gradually as you continue mixing the batter. The consistency will be wet, but not too sticky. Taste for salt and add if necessary.

*This is a good time to pre-heat a large non-stick frying pan over a medium heat. 

Divide the cutlet batter into half (score it with your hand inside the bowl), followed by dividing each half into three "equal" parts to make six cutlets. Form the cutlets in your hands and be sure not to make them too thick (about 1/2 inch in thickness should do it).

Place formed cutlets on a plate and fry three cutlets at a time, over a medium heat, in about two tablespoons of oil, for 3-4 minutes on each side, until the cutlets develop a nice golden crust. In case the cutlets lose their perfect shape when you turn them over, you can fix it with your spatula while they are frying. I did that without difficulties.

Serve immediately and store in a refrigerator, in a closed container, lined up with parchment paper in between each cutlet to absorb moisture for up to one week.

Peace out!
Eat! 

Saturday, June 7, 2014

Easy Semolina Breakfast Cakes

I used to eat semolina porridge (called Kasza Manna in Polish) for breakfast with sugary fruit syrup on top as a kid. It was a typical Polish breakfast catered specifically to kids the same way cereal is here in the US.

Recently I discovered this old favorite in a Polish grocery store, and I felt compelled to try it again. I was planning on making a porridge out of it, but I decided to make this instead. I think I will continue exploring making other semolina cakes in the future. I already have another recipe in mind. Stay tuned...

Cheers!

Semolina Breakfast Cakes
Semolina Breakfast Cakes (Makes About 12 Cakes)

Ingredients
1 and 1/3 cups semolina or semolina flour (I used semolina. Semolina flour is more delicate while semolina is coarse almost like cornmeal.)
1 cup unsweetened soy or almond milk
1 teaspoon baking powder
1 small/medium banana, mashed with a fork (Substitute the banana with one chia or flax egg if you don't fancy bananas.)
2 teaspoons unsulphured molasses (Substitute with  2 teaspoons of maple syrup or raw cane sugar if you don't have molasses.)

*Vegetable oil for frying
This texture is not fluffy like a pancake, but rather it is dense like a cake. Maple syrup will work best as a topping. I did not have any maple syrup. I used organic powdered sugar instead. 
Directions
Preheat a large non-stick cooking pan over a medium heat.

Mash the banana with a fork in a medium bowl. Add baking powder and molasses and mix well. I used a whisk for this task. Add milk and the semolina and mix. Start frying immediately. If you don't, the batter will become too thick while it is sitting on the counter. No es bueno! (no good!)

Fry 4 semolina breakfast cakes at a time, 3 to 4 minutes on each side, in 1 to 2 tablespoons of vegetable oil. Be sure to flatten the batter using a spatula or a spoon as soon as the batter touches the pan. Otherwise the cakes will be too thick. I used a large serving spoon to measure my batter for each cake.

Serve immediately. Best served with maple syrup. If you are planning on using powdered sugar instead, be sure to have a glass of plant milk handy to wash it down.

Eat!

Monday, June 2, 2014

Sweet Potato Red Lentil Stew

Recently I found myself standing in my kitchen staring at a large bowl filled with sweet potatoes. I was perplexed how this copious amount of sweet potatoes ended up in my kitchen.

I knew I had to use these orange beauties soon, but I was not certain as to how. I did not feel like making soup. This was surprising because I make soups often. Mostly it is due to utilizing leftover ingredients. I also wanted to make something substantial. Stew was the next best thing.

Cheers!
Sweet Potato Red Lentil Stew

Ingredients
1 tablespoon canola or vegetable oil
1 medium onion, finely diced
3 large carrots, roughly diced (I buy organic carrots and do not peel them. To peel or not peel?)
4 garlic cloves, minced
6 small sweet potatoes, peeled and roughly chopped (regular potatoes may be substituted)
1 and 3/4 cups red lentils
Freshly ground black pepper (about 1/4 teaspoon)
1 teaspoon salt
1 tablespoon ground coriander (Substitute with cumin if coriander is unavailable. Coriander is more lemony in flavor, but cumin will work well here too.)
1/2 teaspoon turmeric (This anti-inflamotory spice is a permanent resident in my pantry.)
1 tablespoon curry powder
2 bay leaves
1 tablespoon dried cilantro or parsley (If using fresh herbs, add them as a garnish at the end.)
4 and 1/2 cups water or vegetable broth
2 teaspoons apple cider vinegar (add last)

*Note: Be sure to dice the carrots and potatoes roughly the same size so that both cook evenly. 
I sprinkled mine with additional dried cilantro. Fresh herbs would be better, but I am happy with either. For some reason fresh cilantro is not my favorite, and yet I can eat tons of it in this form. 
Directions 
In a large soup pot, sauté the onion and carrots in oil, for about 5 minutes. Add garlic and continue sautéing for another minute. Add all the spices including bay leaves, potatoes, lentils and water. Stir and bring to a boil. Once boiling, lower the heat to medium-low and cook for about 15-20 minutes until the potatoes are soft, but not mushy and the lentils are creamy.

Turn off the heat and add the apple cider vinegar. If you have a lemon frolicking around in your kitchen, you can substitute apple cider vinegar with fresh lemon juice (use about half a lemon). Acid is needed to balance the sweetness of this dish.

Taste for additional seasoning and serve with rice, in a wrap or even pita. The possibilities are endless.

Store in the refrigerator for up to one week in a tightly closed container.

Later peeps!
I ate this stew with black rice cooked in vegetable broth. Very simple, yet kind of fancy pants, don't you think?

Saturday, May 31, 2014

Easy Sunflower Seed and Chive Sandwich Spread

There is a little European grocery store I visit once a month. I go there to purchase European goodies I am unable to get anywhere else. They have the best pickles in brine and other accidentally vegan foods I ate when growing up in Poland.

One day I stumbled upon a vegan pate made out of semolina flour which was excellent. However when I went back to purchase it again, it was no longer available. I wanted to eat it again obviously, so I decided to try making it myself. Instead of semolina flour, I used a more accessible and a very affordable ingredient such as the sunflower seeds.

This sandwich spread is surprisingly easy to make. I think the most difficult part about it is toasting the seeds. They will burn and play when you walk away from the pan. See what I did there? You can use other spices and herbs or finely diced vegetables. The possibilities are infinite.

Cheers!

Sunflower Seed and Chive Sandwich Spread
Ingredients
1 and 1/2 cups raw sunflower seeds
2 teaspoons onion powder
1/2 teaspoon granulated garlic
1 teaspoon smoked paprika (optional)
1/2 teaspoon salt
Freshly ground black pepper to taste (about 1/4 teaspoon)
1/2 cup water, room temperature
1/3 cup chives, finely chopped
You can have a vegan breakfast anywhere in the world using this easy sandwich spread recipe. 
Directions 
Preheat a large non-stick cooking pan over a medium heat and add all of the sunflower seeds. Given that the sunflower seeds already contain natural oils, there is no need for adding additional fat such as oil or non-stick cooking spray. Spread them evenly on the pan and toast for about 4-5 minutes until light golden color. Stir once in a while.

Be careful not to burn them as you will have to start over. It happened to me, and I was not pleased. Once the seeds are toasted, place them on a plate and allow to completely cool off before making the spread.

Place the cooled sunflower seeds in a high speed blender or a food processor and pulse until they become a powder. To make sure there are no whole seeds bumbling about, do this in batches if necessary. Now place the sunflower seed powder in a bowl, and add all the spices. I used a whisk to incorporate the spices with the sunflower seed powder.

Add water and mix well. It will take a minute for the spread to fully thicken. Mix in chives and taste for additional seasonings. You may want to add more salt or pepper or both.

Serve on bread or crackers. Store in the refrigerator in a tightly closed container for 3 to 4 days.

*Note: This spread has a potential for many variations. Use favorite spices and herbs instead of what is suggested. 

Eat!

Sunday, May 11, 2014

Polenta Spinach Casserole and Happy Mother's Day!

Hey there lovelies,

It has been a while since my last post. I have been occupied with writing papers and catching up on sleep. Today I wanted to take some time to wish you all a happy Mother's Day. Sorry dudes! 

Aside from celebrating Mother's Day, I also wanted to share a new recipe with you - Polenta Spinach Casserole. Even a polenta-hater liked it and that is quite a victory. 

Cheers! 
Polenta Spinach Casserole

Ingredients
1 tablespoon olive oil
1 small onion, finely chopped
4 garlic cloves, minced
5 cups fresh spinach, plus 2-3 tablespoons water
2 cups corn grits (also known as polenta)
1 teaspoon salt
Freshly ground black pepper (about 1/4 teaspoon)
2 teaspoons onion powder
1 teaspoon smoked paprika
1/2 cup nutritional yeast flakes
1/2 teaspoon turmeric
5 cups water or vegetable broth

*Non-stick cooking spray for coating the baking pan.

Tastes great the next day pan fried with additional freshly ground black pepper. 
Directions
Preheat oven to 350 F.

In a large non-stick pan, sauté the onion in olive oil, over a medium heat, for about five minutes. Add garlic and continue sautéing for another minute. Stir often. Add spinach and 2 tablespoons of water and sauté until the spinach has wilted. This should take about 2 minutes or so. Add more water if needed for the spinach to wilt. Turn off the heat.
This is how the wilted spinach and onion mixture looks like when done. 
In a large bowl, combine 2 cups of corn grits, salt, onion powder, smoked paprika, nutritional yeast flakes, turmeric, and 5 cups of water or vegetable broth. I used a whisk to combine all the ingredients.

Now add the spinach onion mixture to the bowl, and stir well.

Get thee to the oven! 
Coat a large casserole dish with non-stick cooking spray. Pour the polenta mixture to the dish and place in the oven, uncovered. Bake for 1 hour. Be sure to stir the mixture once, fifteen minutes into the baking process.

Serve immediately when hot or wait until the casserole completely cools off, slice into desired size and pan fry. I like to eat it dipped in soy sauce or with mushroom gravy. The polenta hater enjoyed it with vegan parmesan cheese.

Store it in a closed container in the refrigerator for up to one week.

Straight out of the oven! 

Sunday, April 13, 2014

Vegetable "Veg-Out" Soup and Apartment Hunting

Although I am not looking forward to moving yet again, since my lease expires in August it is time to find another dwelling. I should probably get a trophy for most moves in the time period of 10-years, but then again, I am ready to retire the idea of such a trophy and settle in a place for a longer period of time. I guess I am not going back to NYC anytime soon. I have grown fond of Boston, and living here is just fine with me.

Apartment hunting is the only type of hunting I will ever engage in, and as much as I like seeing other apartments and having a front row seat view to how others live, I am in a sense over it. Instead, I would like a perfect apartment to come to me. I know! The audacity!

I feel the same way about food sometimes, meaning I want to eat something great, but I feel low in energy to execute that feeling into a dish. I made Vegetable "Veg-Out" Soup on a day like that, and I was pleased with the results.

Try it for yourself and be sure to let me know how it turned out.

Cheers!
Vegetable "Veg-Out" Soup
Vegetable "Veg-Out" Soup 

Ingredients
2 tablespoons olive oil
1 onion, finely diced
4 carrots, peeled and diced
2 large garlic cloves, minced
1 (10-oz) package mushroom of choice, sliced (use the stems!)
2 small/medium yellow squashes, ends trimmed, sliced into half-moons
3 cups fresh spinach, packed
1 (15-oz) can garbonzo beans/chickpeas, rinsed and drained
1 cup brown rice or grain of choice
7 cups vegetable broth
Freshly ground black pepper (about 1/4 teaspoon)
2 teaspoons sea salt (use more or less depending on preference)
1 tablespoon dried oregano
1 tablespoon dried basil
1/2 teaspoon tarragon leaves
1 teaspoon thyme
Looking good! 
Directions
In a large soup pot, sauté the onion, carrots and mushrooms over a medium heat in olive oil, for about 6-7 minutes. Add garlic and continue sautéing for another two minutes. Add a splash of water if necessary to prevent from sticking to the pot. Stir often.

Add all the seasonings, brown rice, and vegetable broth. Cover and bring to a boil. Once boiling, lower the heat to medium-low and cook for 35-45 minutes until the rice or grain of choosing is cooked.

Fifteen minutes before the soup is ready, add the squash and garbanzo beans to the soup pot, and finish cooking the soup until you reach the 35-45 minute mark.

Turn off the heat, add the spinach, and stir. The spinach will wilt on its own without the need for further cooking.

Taste for seasonings and add more salt or pepper or both depending on preference. Use an immersion blender to blend 1/3 of the soup in the soup pot to create thicker consistency. Alternatively, transfer 4 to 5 cups of soup to a blender and blend until smooth, and add it back to the soup pot.

Enjoy! 

Eat! 

Saturday, April 5, 2014

Red Cabbage Beet Soup and Good-Bye Winter!

Alas! the winter has left, and I am still struggling with accepting the inevitable entry of a warmer season. It takes me a while to get used to it, and from hearing others talking about their excitement of winter being gone, I feel alone in my season preferences. However, it is COOL to be different, so there!

I refuse to stop making soups, and will continue making them until winter rolls around yet again. If you are a soup fan like me, you will enjoy this strange soup conception I came up with below. It works flavor wise, and most importantly, it is really easy to make.

Cheers soup lovers!
Red Cabbage Beet Soup. I served it with cooked red beans and a 'hunk' of bread. 

Red Cabbage Beet Soup

Ingredients
1-2 tablespoons olive oil
1 medium onion, finely diced
4 carrots, peeled, and diced
1 medium red cabbage, outer leaves and core removed, shredded or thinly sliced
3-4 medium/small beets, peeled and chopped
4 garlic cloves, minced
1 (28-oz can) crushed tomatoes
1 teaspoon or more sea salt, depending on preference
Freshly ground black pepper to taste (about 1/4 teaspoon)
1 teaspoon marjoram
1 teaspoon coriander powder
1 tablespoon ground cumin
6 cups vegetable broth (additional cup may be added if too thick)

*1/2 cup cooked red beans per one serving of soup, for garnish (optional)

Directions 
In a large soup pot, sauté the onion and carrots in olive oil over a medium heat for about 8 minutes. Add garlic, and all the spices, and continue sautéing for another minute or two. Add a splash of water if necessary to prevent from sticking.

Add the remaining ingredients, stir, cover and bring to a boil. Once boiling, lower the heat to medium-low and cook for about 45 minutes, until the beets are fork tender. If the soup gets too thick, add another cup of vegetable broth during cooking.

Turn off the heat, taste for salt, and add more if necessary. The soup should be sweet, but not that sweet. Confusing? Let me explain. You want to taste the sweetness of the beets in this soup and when adding too much salt, the beet flavor will not come through.

Use an immersion blender to blend the soup, but not entirely. Leave some chunks of beets and cabbage for texture. Serve with cooked beans on top and vegan sour cream if you have it.

Eat!